
this ottoman from Target (and only $17.00!) has been used for so many things. i bought it when i first moved out of my house when i was 18. and have continued to find many uses for it from being a chair, to holding my printer, to now being a key part of Bayli's nursery. i love the storage space in the ottoman and have found it to be the only place in her nursery that fits all most of her blankets.


to be honest, when i started this project i really was just winging it. i have never done any work with home furnishings before (besides curtains which don't count in my opinion cause they are so easy...) i really was surprised by how simple this was, i guess because there is wood and staples involved it seemed daunting but to be honest it was much easier than making a shirt. but... because it was my first time doing anything like this, i only decided to do a tutorial for it halfway through the project, which means i'm missing a few pictures so, here's what we've got. -i am going to refer to the two pieces of the ottoman as the "body" and the "lid"-
Supplies:
1/4"/6mm staples
stapler/staple gun
1 yard of material (mine is from Hobby Lobby)
knife/pliers (for removal of staples)
seam ripper
scissors
thread to match
pins
sewing machine
first you remove all the staples that hold the teal material and the black/brown lining to the wood. my husband did this with a knife and pliers. make sure you pay close attention to how they were stapled together as you will be replacing all those staples at the end of the project. (not pictured)
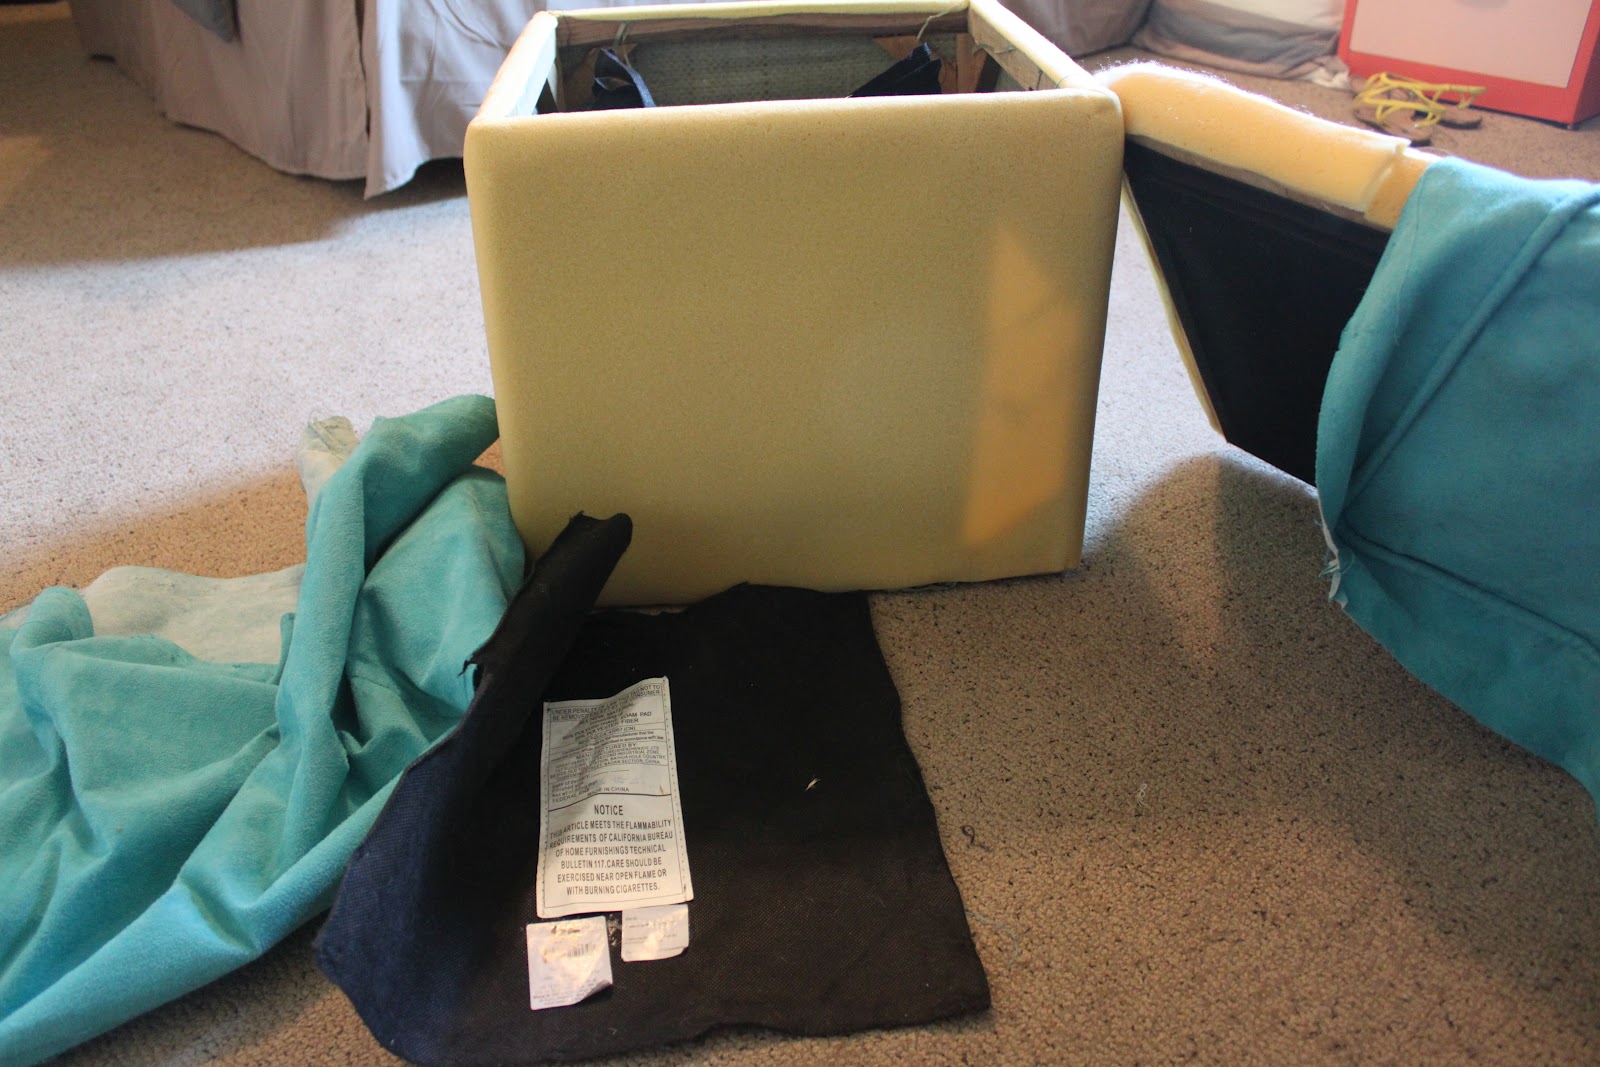
next unpick the teal outer covering of the ottoman, this ottoman was held together with just bias stitches so it was a lot easier than i thought it would be. this is done because i used the unpicked pieces as my pattern. once they are unpicked you should have items like those pictured below.
 cut out the four sides of the body, i did this by folding the material in half, and in half again, then cutting out the rounded square on the non-folded corner. the left over material you will use to do the lid's top and sides and the binding.
 next you sew the four sides together (with at least a 1/2" seam allowance) by placing right sides together until you form a loop.

 then sew that to the lining of the body. this is a bit tricky. there is a wood base that is inside the lining, so, making sure the right sides are together, pin and sew the two together (with 1/2"" seam allowance) by flipping the outer material inside out and placing it inside the lining all the while keeping the wood inside. you might need someone to help hold the wood upright while you sew.


check to make sure it fits around the frame of the ottoman, if it does, you are finished with the body... mostly.
next you do the binding of the lid, the styrofoam binding that the manufactures used, i just recycled and used again but they sell binding at the store if you want to use that instead. cut a 2" strip that is the length of the binding, fold in half with the binding on the inside (right sides out) and sew up next to the binding.
 i didn't know a more professional way to connect the two edges because the styrofoam would not slip through the material like a usual binding so i simply sewed them together and cut off the excess. this is the one "blemish" on my ottoman, but i could not figure out how to do it differently. if you know a way, then feel free to say so in the comments below.
 next you cut out the rectangular sides and the top of the lid, using the pieces you unpicked as a pattern. make sure if you are using a material with a design that you match the designs up, for example you would not want your stripes to all be horizontal for the sides and vertical for the lid, etc. (not pictured)
now make a loop out of the four side pieces then you pin them all together with the binding in the middle, right sides together.
 sew. make sure that when you sew them together you hug as tightly as you can to the binding "poof" and be careful around the corners. this way, your stitches from when you sewed the binding inside won't show when everything is flipped right sides out and pulled taught.
 place over top of the lid to make sure it fits the way you want, if it does, you move onto stapling.
because you remembered where and how to staple the material to the frame, and the lining on top of it all, like i said earlier. i am not going to type it all out. also, i wasn't the one that did it so i honestly don't know. but, you want to make sure that you use staples that are 1/4"/6mm long. any longer and it might poke through. pull tight so that it looks professional, and cut off any excess that might show.


 the finished product! i seriously love it, it looks so much better in the nursery than the awkward teal one it was before. i must admit, this upholstery thing is kind of addicting. i'm currently on ksl looking for some chairs or stools to do next!


to be honest, when i started this project i really was just winging it. i have never done any work with home furnishings before (besides curtains which don't count in my opinion cause they are so easy...) i really was surprised by how simple this was, i guess because there is wood and staples involved it seemed daunting but to be honest it was much easier than making a shirt. but... because it was my first time doing anything like this, i only decided to do a tutorial for it halfway through the project, which means i'm missing a few pictures so, here's what we've got. -i am going to refer to the two pieces of the ottoman as the "body" and the "lid"-
Supplies:
1/4"/6mm staples
stapler/staple gun
1 yard of material (mine is from Hobby Lobby)
knife/pliers (for removal of staples)
seam ripper
scissors
thread to match
pins
sewing machine
first you remove all the staples that hold the teal material and the black/brown lining to the wood. my husband did this with a knife and pliers. make sure you pay close attention to how they were stapled together as you will be replacing all those staples at the end of the project. (not pictured)
next unpick the teal outer covering of the ottoman, this ottoman was held together with just bias stitches so it was a lot easier than i thought it would be. this is done because i used the unpicked pieces as my pattern. once they are unpicked you should have items like those pictured below.


check to make sure it fits around the frame of the ottoman, if it does, you are finished with the body... mostly.
next you do the binding of the lid, the styrofoam binding that the manufactures used, i just recycled and used again but they sell binding at the store if you want to use that instead. cut a 2" strip that is the length of the binding, fold in half with the binding on the inside (right sides out) and sew up next to the binding.


now make a loop out of the four side pieces then you pin them all together with the binding in the middle, right sides together.


because you remembered where and how to staple the material to the frame, and the lining on top of it all, like i said earlier. i am not going to type it all out. also, i wasn't the one that did it so i honestly don't know. but, you want to make sure that you use staples that are 1/4"/6mm long. any longer and it might poke through. pull tight so that it looks professional, and cut off any excess that might show.


To those who look at the picture of me stapling my leg please realize three points:
ReplyDelete1) You should probably be more careful then that, especially if you are not familiar with a large stapler (they use a lot of pressure)
2) I have used these a lot and zero of my cuts scars or potentially missing fingers are caused by a stapler.
3) Please do not show this picture to my mother, she doesn't sleep well as is;)
How cute is this?! I can't believe you made that! I am your newest follower, love your blog!! :)
ReplyDelete-Bridgette
Follow me back at: bridgettenicole.blogspot.com
The author is sharing the first experience with upholstery. Useful information
DeleteGreat posst thankyou
ReplyDelete